Wednesday, December 15, 2010

Kids Wing

I love the fact that I have an area in my house I can refer to as the kids wing.
A place dedicated to all things childlike and fun.
While it doesn't seem like much work has gone into this section of the house we did put quite a bit of time and effort there.
My dad really worked hard in improving the look of his grand-kid's rooms.
He plastered and patched the walls and ceilings where they had been cracked or water damaged. He rehung all the doors so that they would be straight and close properly.
He, as well as my mom, painted every room to freshen and clean things up.

While not much has changed we really notice a difference. What once was a just a few small bedrooms will now be the hub of the house for years to come.
Here are the before and after shots of the landing and the second kids room.


Landing


Before

Notice the water damage under the window which my dad had to re-plaster. The blanket hanging on the wall was hiding a big hole, which my dad had to patch.


After

We plan on making this into a play/craft/reading area for the kids. I envision a built in book shelf running along the wall under the window. A reading chair, kids table and soft rug. Lots of books and games. Oh I can't wait to get all cozy here with my little ones!!!


Future babies room

Before


I unfortunately don't have the original before photo. The room was being used as a indoor garden and was not suitable for photographing. But this photo is what the room looked like after my dad got his hands on it. Trust me.....huge difference.

After


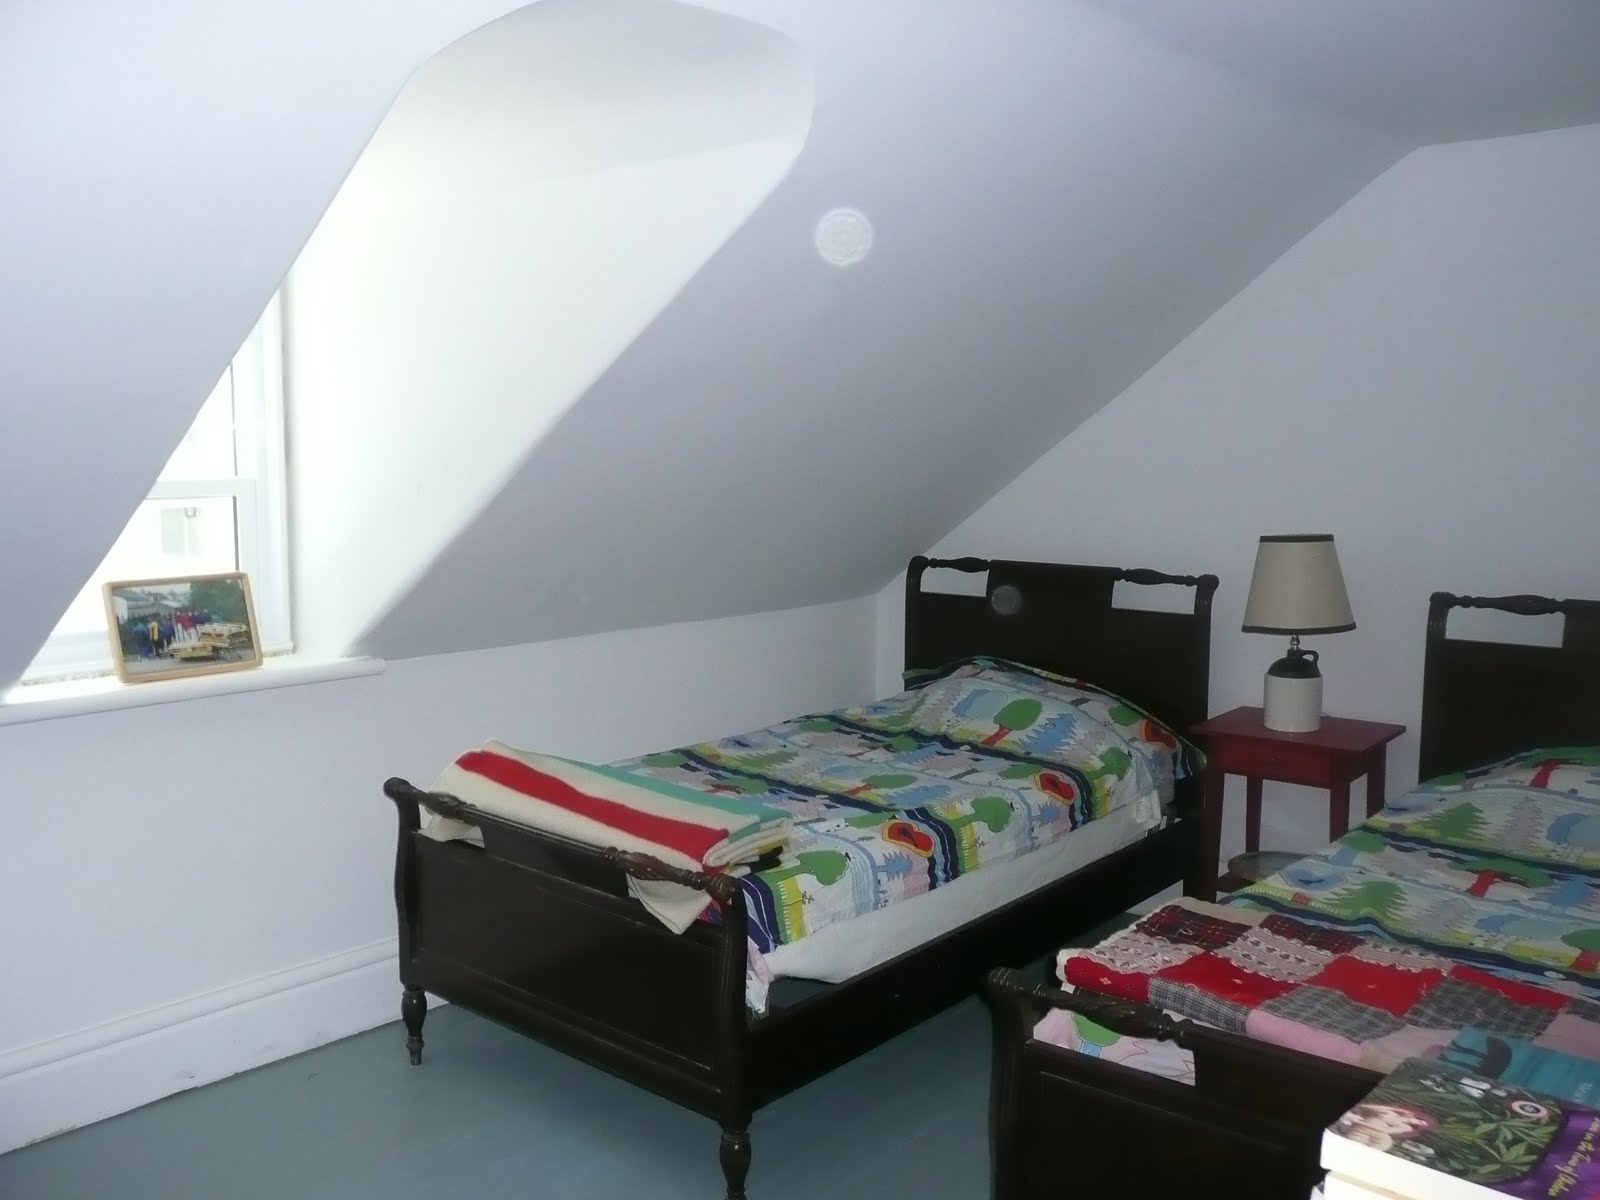
I love the window in the room, as it lets in an incredible amount of light. The only problem is that is a round window and I don't know what we are going to do for a window treatment?
I placed two single beds side by side anticipating future sleepovers. And the colour of the day in this room is red!
However things are going to have to change in the room and quickly, as we are expecting our second child in April.

Hallway from old to new

With the addition of extension we needed to figure out how to seamlessly bring the old and new buildings together. While the outside came together beautifully we were a bit uncertain about the inside.


Our major issue was the hallway that would run from the old part of the house into the extension on the second floor. We really wanted to keep the original floors, which were this amazing diagonal wood flooring. But after much discussion and a realization that we actually needed to use this flooring in our master, we tour it up and put in one flooring running down the entire hallway.


Our next issue with this hallway was it's length. It was a very long hallway and we were worried it would feel too narrow. We tried to balance the length by adding two windows along the outer wall of the extension.


The section in the old part it was even narrower as the walls were so much thicker. Too take advantage of the depth of the wall we decided to build a bookcase right into the wall. This made the hallway seem a bit wider and is a great focal point for an area we thought would end up being wasted space.


My dad used the old hemlock boards we had removed from the walls to make the shelves. Then he used the same mouldings that we had used around our windows and doors as a frame.

We loved the way the book shelf turned out, especially now that it is filled with our cherished books, pictures and Inuit carvings.


It's hard to see here but this piece of beaver board reads "Alex Carrol, Alex Logan, 1912".
As I was chucking pieces of old beaver board into the fire I happened to take a look at this one right before throwing it in. I saw the writing and realised what I was holding. Proof to our homes age. We assume these names are that of the workers who built the houses extension in 1912. Love having a little bit of my house's history out on display.


The hallway ends at the top of our new stairwell. The ceiling height here is really great so we wanted to make a statement with a really large light fixture. As soon as I saw this one I knew it would be a perfect fit.

Guest room


One of the other main reasons we decided to put on an extension was to add another bedroom to the house. We had removed one of the original four bedrooms when we expanded our master so we wanted to make sure we relocated it elsewhere.
Neil's parents live about an hour and a half away so we wanted to make them feel welcome in our home. Knowing we had a room set up just for guests would hopefully entice them, as well as our many friends living in the city, over to stay.


We planned for the new room to go at the very end of the new extension, right beside the family bathroom. This way our house was set up into three distinct private areas. The kids wing, the master and the guest wing.


The outer walls are up and the holes for the windows are in place. Lucky guests will have two windows in their room!!


The framing is up and the extension starts to take shape. This is a view from inside the guestroom.....looking into the family bathroom and hallway.


The windows are in and the plastering of the gyp rock complete.


We got it all painted a light beige by Benjamin Moore.


The new pine floor is in place. Love how fresh it looks......very Scandinavian!!


And finally the guest room is complete!!


We bought the bed at Ikea, the light blue bedding at Structube and all the other furniture are hand me downs. Of course we need some window treatments, accent pillows, a few more pieces of furniture and some artwork to finish the look.

But like with every other room in our house this will be a work in progress.


You are welcome anytime!!


Powder Room

While we were designing the extension we made sure to add as many of our wish list items as we could fit in and afford. One of the must haves was a powder room on the main floor. I did not want to have to run upstairs every time myself or one of our kids needed to use the washroom.


So we made sure to make room for a little powder room off of the family room.


Framing and plumbing in place. It's amazing how happy such a little room has made us.


I really wanted to put wallpaper in the powder room seeing that it is such a small space I can play with my decorating a bit more. I had read somewhere that installing a wood wainscotting around the base of a powder room would help ensure your wallpaper doesn't get damaged by water. We put up the same pine wood that we had used in the mudroom, but this time opted to paint it a very light grey. The toilet and sink are both by Kholer and suit the minimalist look of this small room.


Now I just have to choose my wallpaper, find a mirror and other bathroom fixtures and the room is complete. It would also help to get a door knob on the door as many guests feel a bit exposed without anything keeping the door shut.
So many little projects left to do......

New Stairwell

Seeing that we removed the old stairwell from the kitchen and that our house was increasing in size, we needed to add another set of stairs.
We decided to put them in the family room seeing that it would probably be a room used more frequently and it would give us quicker access to the new rooms upstairs.

I had seen an episode of Sarah's House season one in which she is rebuilding a set of stairs. I knew right away this was the look I wanted.


The only thing was that I didn't know if my builders could do the level of work of Sarah's.


The temporary stairs went in. And they stayed this way for many months. Allot of blood, sweat in tears went into the building of these stairs....literally. One of the builders had taken the bottom set of stairs down to measure them and when putting them back up forgot to nail them down. A little while later he ran up the stairs to get something, made it almost to the top and then the stairs came crashing down....with him still on them. He bashed his armpit on the landing and fell all the way into the basement. Luckily he only needed stitches......and despite our request to see him take it easy , was back at work the very next day.


The new stairs started to take shape and I was so happy to see that they were able to re-create, almost exactly, the stairs I had shown them.


The best thing about these stairs are the steps. My contractor took the old beams from the roof we removed and planned them down into these gorgeous steps. I love that a bit of the old house was used in building the new.

Adding to the Family

When we bought this house we had visions of a home filled with children and family visiting. While the house was large, it wasn't set up to accommodate a modern family.
We wanted room for guests and family to feel comfortable. We knew we needed to put on an extension. One of the main reasons for this decision was that we wanted a family room. We wanted to keep the original living room formal and the cellar was not a place we could renovate to accommodate a family room. So out and up we went.
We wanted a large family room for TV watching and game playing. We wanted it to feel open to the backyard with lots of windows and french doors.
So with this in mind we got to work.


The extension was built and the holes cut for the windows and door.


Windows and doors installed, gyp rock up, electrical in place. Just need to lay down the flooring, put up the moulding and paint. I unfortunately was distracted by other things going on in our lives as I don't have any more pictures of the work in progress. So you will just have to imagine what our hard work looked like in action.

However I do have the finished product on film. So here is what our family room looks like as of right now.


As with all of our other rooms we still have allot left to do in terms of decorating and furniture. But it is definitely serving us well as is and we are extremely happy with our decision to add on.

Living and Dinning Room

With all the restoring of these two rooms out of the way we finally got them painted and put what furniture we had into place. While there is still allot left to do here is the transformation photo by photo.

Before


This is what the living room and dining room looked like when we first bought the house.

After

We bought the tuxedo couch and high back chair and coffee table from Maison Corbiel in Montreal. We loved the dark colour of them and decided to use the same tone of grey in our walls, just a while lot lighter. The yellow chair is a hand me down and will be reupholstered in the future. The red hutch was a great auction find. This piece will be my jumping off point for the accent colours.


It's a great room to entertain in or to just lounge around with a good book. I can't wait for the bay window seats to be finished.......

With the living room opening right up into the dining room we love the flow of the two rooms. We need to make sure that both rooms work well together both design wise and entertaining wise.


The green olive colour by Benjamin Moore was inspired by the trees that surround this side of the house. I really want to complement the surrounding area and continue to add some natural looking elements in the dining room.

Seeing that we don't yet have a dining table this room has been used mainly as a playroom for our daughter. Both the piano and wooden hutch came with the house. The piano will be relocated to the family room once we start using this room or it's designed purpose.


Now we just need some fabric for the windows and pillows, some artwork, a few more pieces of furniture (a dining room table would be nice), a chandelier and we're done!!!!

I have such a great feeling every time I walk into this section of the house. It makes me feel so comfortable and at home. I hope that we did these two rooms justice in restoring them and I hope that they will bring us happiness for many, many years to come.
Related Posts Plugin for WordPress, Blogger...